After I configured DC (It is desirable that DC role is installed on separate server from Radius role) I started Radius installation. If you want Radius to work, first step is to install CA (certificate authority) and configure it. We`ll first install both CA and NPS roles, and then configure them.
Server Manager | Roles | Add Roles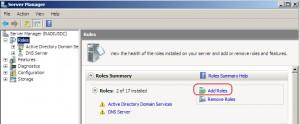
Next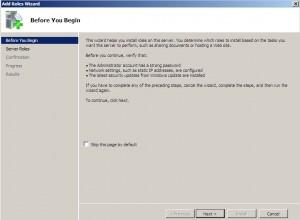
Choose | Active Directory Certificate Services | Network Policy and Access Services | Next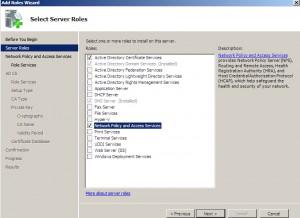
Next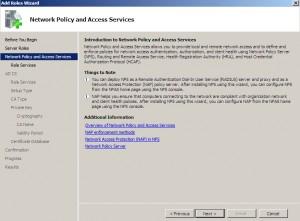
Choose | Network Policy Server. Optionally you can choose other services… Next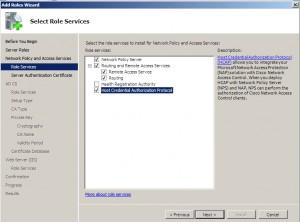
Choose | Create a self-signed certificate for SSL encryption | Next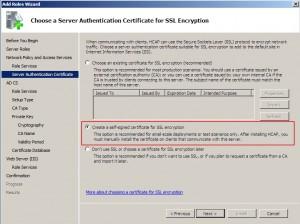
Next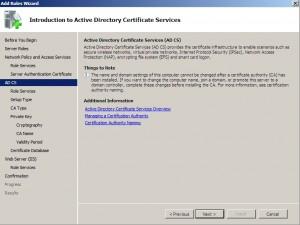
Choose | Certification Authority |Next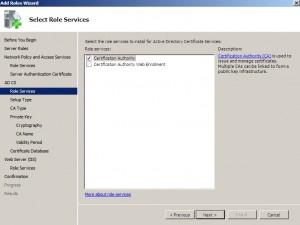
Choose| Enterprise |Next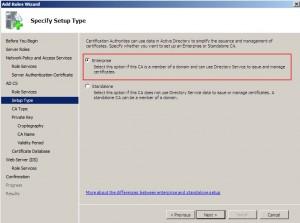
Choose |Root CA |Next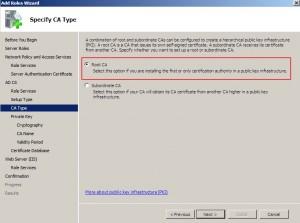
Choose |Create a new private key |Next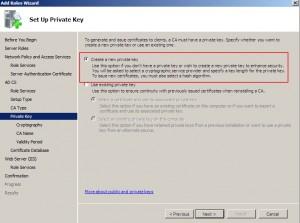
Leave everything as it is | Next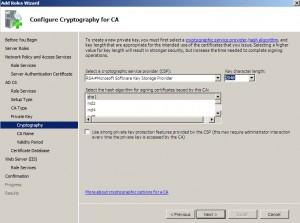
Next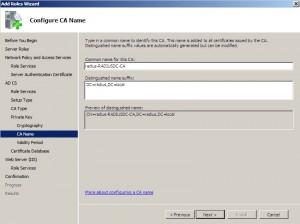
Next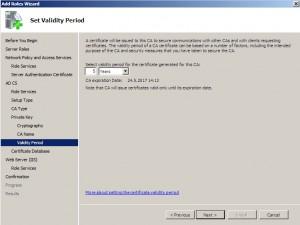
Next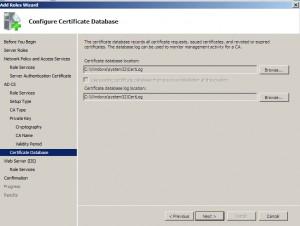
Next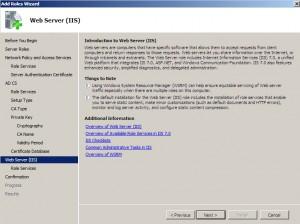
Leave everything as it is in IIS setup, or choose additional options that you need |Next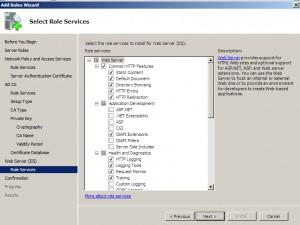
Install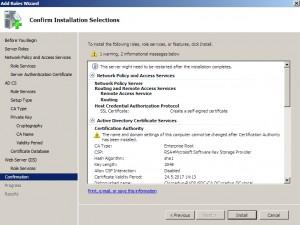
Installation…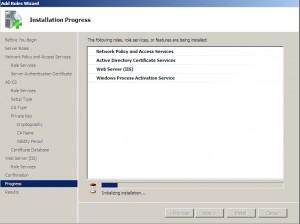
Installation successful.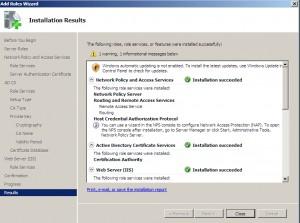
Configuring certificates
After installing Active Directory Certificate Service and Network Policy Server service we need to configure them.
I`m starting with Active Directory Certificate Services.
Start MMC | File | Add/Remove Snap-in | choose Certificates |Add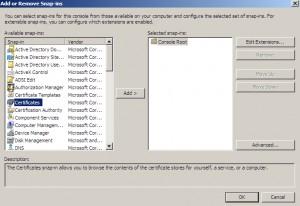
Click on Add, new window will show up |Choose Computer |Next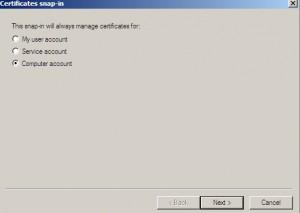
Choose | Local computer |Finish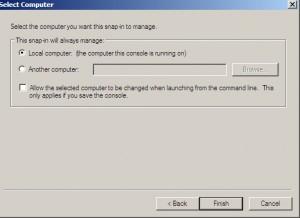
Confirm new MMC Snap-in by clicking on OK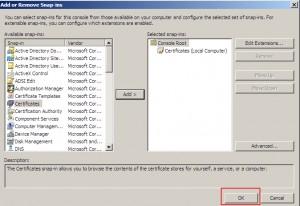
Created Snap-in opens up. Expand Certificates | Choose Personal | Right click on Certificates |All Tasks | Request New Certificate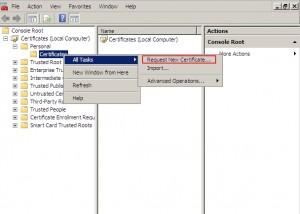
Next
Choose your computer |Enroll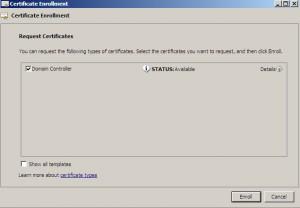
Successful | Finish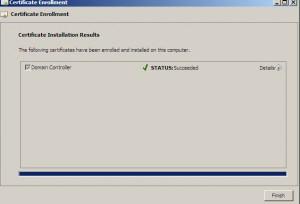
With this we finished configuring certificates for our Radius server.
Configuring RADIUS service
Choose Start | Administrative Tools | Network Policy Server
Right click on NPS and then click on Register server in Active Directory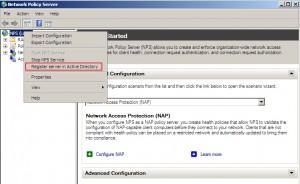
OK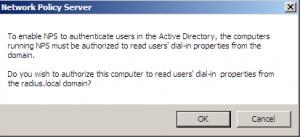
OK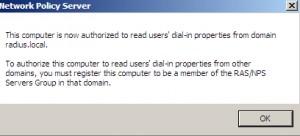
Stay on NPS (local) and from the right window choose |RADIUS server for 802.1x Wireless or Wired Connections |Click on Configure 802.1x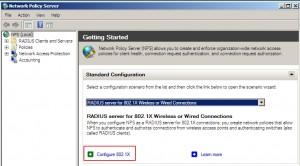
Choose |Secure Wireless Connections | Choose Name |Next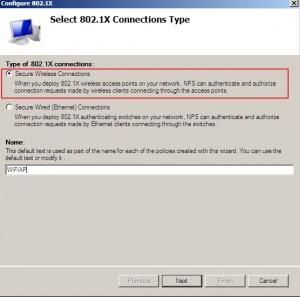
Radius clients |Add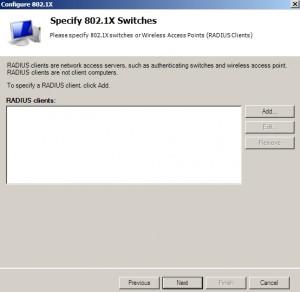
Choose a name for client | Enter IP address (it has to be fixed) of client that we are registering | Shared secret – Manual |Enter password for client identification |OK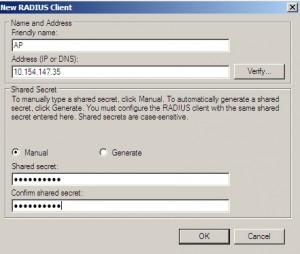
Next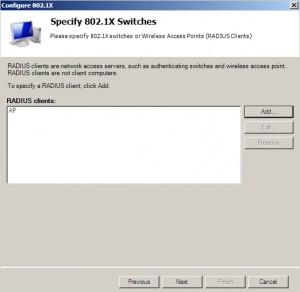
Choose | Microsoft Protected EAP (PEAP) |Click on Configure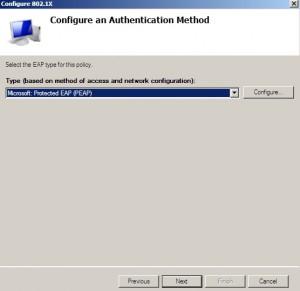
Certificate Properties | Select Secured password | click on Edit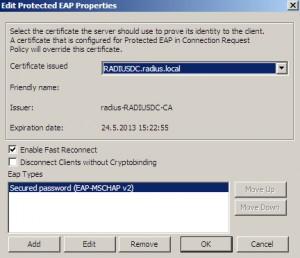
Edit number of authentication retries to desired value | OK |OK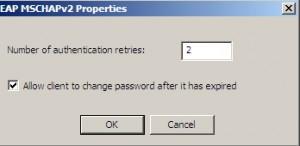
Next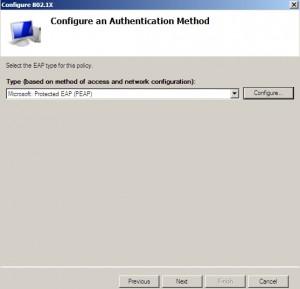
Choose groups that will be able to authenticate with RADIUS |Next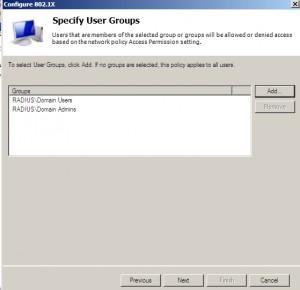
Next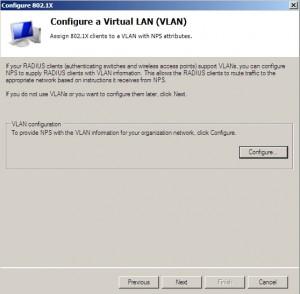
Finish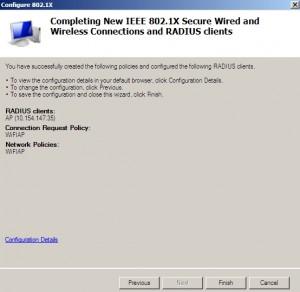
After finishing configuration click on Start |Administrative Tools | Services |find NPS service and restart it.
By clicking on Radius Clients and Servers | Radius Clients I can see created client. I`m now able to authenticate with RADIUS.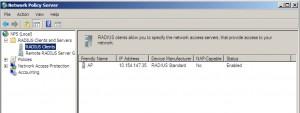
That is the basic setup for RADIUS server.
You can setup RADIUS more detailed under |NPS |Policies |Connection Request Policies or Network Policies
I`m now directing my attention to Network Policies
Network Policies | Choose created WiFiAP and right click| Properties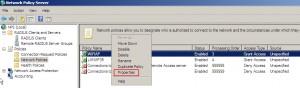
Tab Constraints |I have chosen even less secure authentication methods for testing purposes. In production environment you should choose only most secure protocols.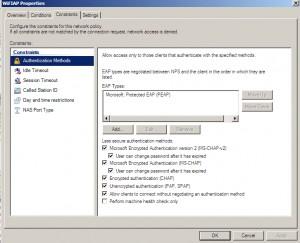
Tab Settings | Encryption. For testing purposes I left all options ON, in production environment you should choose strongest encryption (MPPE 128bit)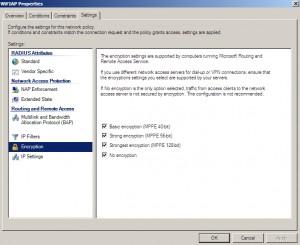
You should go through all the settings and setup RADIUS to your preferences.
ACCESS POINT setup
I used Linksys WAP54G. Setup is more or less the same for all APs. Although I had some APs that just won`t work with Windows Server based RADIUS server, so be careful when you choose your equipment.
Access Point should have ethernet connection to the network environment where RADIUS server is located.
Access Point should be setup as follows:
Static IP, same subnet as RADIUS server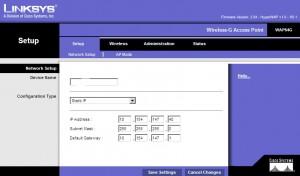
Setup as Access Point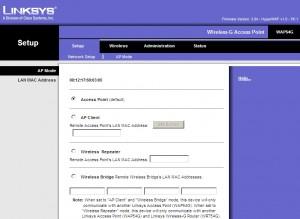
Basic Wireless Settings |Setup SSID name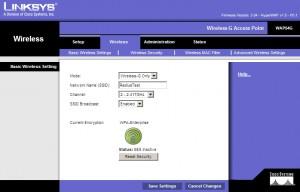
Wireless Security |Choose WPA Enterprise ( My AP is older so It doesn`t have WPA2 ) |Encryption AES | RADIUS Server: IP address of RADIUS server | RADIUS Port: it`s usually 1812 |Shared secret: you defined it while creating new client in NPS, desirable value for shared secret is for example: 984752G2N3
Key renewal: leave as it is.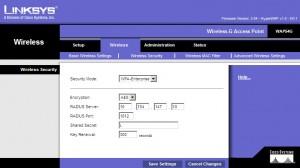
Advanced Wireless Settings | Leave default settings.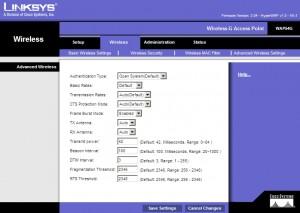
With this step we configured AP for communication with RADIUS. Save your settings and reboot Access Point.
Testing
I want to connect my iPhone (iOS5) to WiFI network RadiusTest and by that connection test connection between client – AP and RADIUS server.
On my iPhone in WiFI networks I can see created WiFi RadiusTest – I`m taping on it to connect.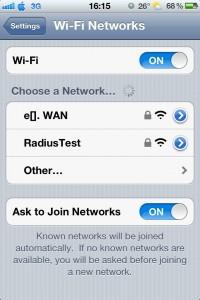
I need to authenticate. I entered my domain user account and password in following form : Domain\user + password | Choose Join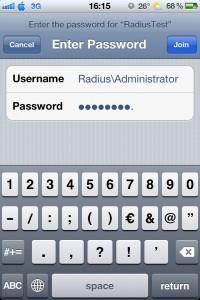
After few seconds I`m offered the certificate that I created earlier on RADIUS server | Accept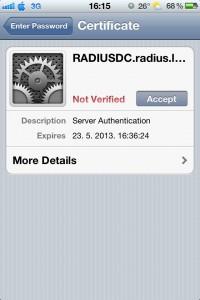
iPhone is successfully connected and authenticated on RADIUS server.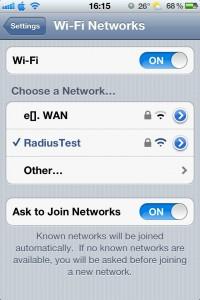
With this step installing, configuring and testing RADIUS server on Windows Server 2008 x64 is successfully finished.


Its not working on IOS 8 and above...is something missing?
ReplyDeleteAndroid devices doesnt work too...I ve setup exact the same configuration as on your setup, I have the same access point. Devices asking for username and password but certificate offer never appeared on my ipad or android device.
DeleteThank you in advance